When I’m teaching people for practical shooting, I often discuss what I call the “hierarchy of skills.” This is what we would use to guide us from becoming a new shooter to a top level competitor in terms of skill development. Suppose we have a 32-round stage with 14 paper targets and four poppers—a typical “best two on paper and steel must fall” situation. What would be the most used skills to the least?
Let’s take a look in terms of most used to least used.
- Shooting Fundamentals—32-plus rounds fired means this is used the most. Things like grip, trigger control, aiming, acclimation to recoil and recoil management.
- Transitions—18 targets, including the draw and presentation as a basic transition means we will be doing some form of moving the gun onto a target at least 18 times. This article will mainly focus here.
- Movement Skills—position to position movement, blending and shooting on the move. In the larger field courses, there may be five or six positions to get to, and getting there more quickly is a great advantage.
- Reload—In today’s game, especially with 15-round production, maybe two reloads per stage, if that.
- Draw—maybe 1 per stage, and if there’s movement off the draw involved (very common), it’s less of a factor.
Now, for a brand new shooter, getting the draw and reload to a reasonable level (around one second for a draw to A zone hit at seven yards, around 1.2 seconds to the same target for a reload) is a good initial goal. After all, presenting the gun with a good grip and being able to fire immediately is highly beneficial, and most newer shooters need to develop this first, as it helps with the shooting fundamentals as well. However, once you’re there, you can begin to prioritize the more important skills that will start to cut seconds off your stage times.
If you look at the list above, after shooting fundamentals, we have transitions. Picture this scenario: You’re shooting against your favorite friend you want to beat on this 32-round stage I described above (14 paper and four steel). You guys come up with the same exact plan, and do everything the same—except they are 0.2-seconds quicker on every presentation and transition. Without doing anything different except the quicker transitions, they have beat you by 3.6 seconds. That is a huge difference in time and, in my opinion, it’s something that should be focused on heavily in training. I’ve been exploring and working on mastering this particular area of skill development for a while now, and I’d like to share with you some things that will help you reduce the time to make the same gains I have. So let’s start exploring this.
THE VISUAL COMPONENTS OF A GREAT TRANSITION
In the beginning of learning how to master transitions, the most common mistake I see students make is that their eyes are connected to the gun too much. The first bad habit we have to replace with a good one is to get the eyes leading the gun to the next spot on target. Our head and eyes are capable of much quicker speeds than our arms and gun are, so we need to start by maximizing that vision speed. As soon as the bullet has left the barrel and we’ve called a good shot, our head and eyes can then aggressively hunt the next target. There is no reason for us to be doing this at anything less than maximum speed. This alone will help you speed up your transitions, along with gaining accuracy.
The next most common visual mistake I see is that people are looking at the entirety of the target, versus a smaller area of the target. The smaller area we can visualize, the higher our chance of guiding the gun exactly to that spot, and the higher our potential accuracy generally is. You can tell when someone is looking at the entirety of the target or the wrong spot on the target by the hit pattern on that target generally—the entirety of the target usually means there are hits toward the edges of that target, but not necessarily close together (usually something like a Delta and then an Alpha, in the direction of the transition, ie., moving left to right, left Delta, Alpha), whereas looking at the wrong spot usually produces two hits very close together albeit in the wrong spot (two Charlies about two inches apart). Something that can help you in training would be to add a mark on the targets where you want to look. This is a great training aid, especially in the beginning when playing with this concept. However, we want to make sure it’s a training aid and not a crutch—so as you become more familiar with finding the spots on target, reducing the amount of visual reference points will become useful. Using something like one out of every five targets with an aiming reference serves as a good check to confirm that we are doing what we’re supposed to be doing. When we’re doing things correctly, we will naturally snap to that spot, and when we’re not, it will give us a gentle reminder to do so.
The evolution of this training aid is something I thought of more recently. As we get familiar with seeing a physical spot on target, what if we could create this spot with our mind? Something that had helped me in the past was imagining pre-programmed images on every target with my sights—I’d visualize in my mind what I wanted the sights to look like on every target. As I’ve been learning with the red dot over the last season, I evolved this concept a bit further. You can try this with me. Pick a “target”—it can be an actual target, or an item within your area currently (light switch, picture, etc.). When you look at it, see if you can imagine that there is a sight picture/dot on it, as if it is already there. I have started to call this concept the “ghost dot” concept. If I can imagine the dot on target already, all I have to do is match the actual dot to the one created in my mind. A good analogy that brought this idea up is from racing games. When you would have a best lap, some games would give you a “ghost car”—this ghost car would be an identical representation of your best lap to date. Applying this idea to shooting has tremendous benefits. It allows us to properly visualize success and what success looks like, and in the moment we can respond to success more quickly (press trigger sooner) and recognize when it’s not right and address it more quickly (fire a makeup). Try it in your training and see if you can apply it in your walkthroughs and it will create positive changes in your shooting.
THE PHYSICAL COMPONENTS OF A GREAT TRANSITION
The physical components of a great transition relate to the physical movement of the gun. There are three of them that I commonly teach in classes and in my online Accelerator program. The first component is the EXIT. A common thing I see when teaching shooters is that they often return the gun back on target before moving the gun to the next target. The reality is that as soon as the bullet has left the barrel, technically speaking we can do whatever we want with the gun and it will not affect where that bullet is going. I often demonstrate this by doing the ultimate shooter’s flinch in a class where I yank the gun straight down while having the bullet go where I want it to (hat tip to JJ Racaza for this little trick). As long as I hold still long enough for the bullet to leave the barrel (which is before recoil is even felt), it doesn’t matter what I do after that. Applying that to transitions, the exit component is just that. As soon as the bullet has left the barrel, we can aggressively move the gun during the recoil cycle to another target. The goal here is to be as aggressive as possible. When it’s done correctly, the gun will snap to the next spot your eyes have picked. From a live fire drill perspective, start aimed on target. When the beep of the timer goes off, press the trigger and try to yank the gun off target as hard as you can. You are trying to pull a shot off target here, and you’ll realize that it is hard to actually do. It will teach you about how much you can really get away with when it’s done properly.
Once you understand that component, now it’s time to work on the entry. Another common mistake people make is that they don’t have a precise enough entry onto the next target to allow them to start shooting immediately. The goal is to be able to precisely guide the gun to where our vision is on the next target. If you think about the next target spot as an icon on a computer screen, that analogy works well for a lot of people. We identify the next “icon” and move our mouse pointer over to it smoothly. It accelerates to a point, then decelerates into a clean stop on the icon. An entry onto a target is a similar principle. Pick your “icon” (spot), move your hands to your face (mouse pointer and mouse movement) and then “click” (press the trigger) when you’re there. A simple way to practice this is to start aimed on one target, and on the beep, move your gun to the next target and press the trigger as soon as you see what you’d like to see (a blip of color from the dot/fiber on front sight is a good start). The most common mistakes with this are that you try to decelerate too late, resulting in overshooting the target or that you try to predict when the gun is going to get there, versus your response to it, which results in shooting too early. Remember the movement of a transition can also be described like driving a car. You must accelerate, then decelerate to a stop. I tell students that how far you can accelerate before having to decelerate depends on your brakes (your body) and the driver (your mind and training experience). Through training and development, you’ll get a great feel for how fast you can accelerate and how well you can stop.
The last physical component is what I call “Return & Release.” When we’re shooting a stage, it is common for paper targets to be scored best two shots on paper. This means we must be able to combine the elements of recoil control (Return) with the elements of moving to the next target (Release/Exit). Usual mistakes here are that the shooter returns the gun back to target after the second shot, delaying the transition exit to the next target, and that a shooter starts to head to the next target too early, dragging shots in the direction of movement. Learning to separate these two components and perform them seamlessly will deliver better accuracy and improve the ability to shoot sooner on the next target as well.
The easiest way to practice this is to start aimed on a target. When the beep goes off, fire two controlled shots (something like 0.3-0.4 time between shots is what I’m typically looking for). Be able to return the gun onto the target between shots one and two, then be able to release/exit the target immediately and aggressively after the second shot. The reason I look for controlled shots is because you need to be able to separate the shooting speed with the movement immediacy. I’ll see students shoot really fast and then move slowly off the target, and I’ll also see students where their shooting speed dictates their movement speed—when they shoot fast, they move fast, when they shoot slower, they move slower and delay their movement.
After practicing these three separately as micro-exercises, you can combine them together with a three- or four-shot string on two targets. Ideally, the split and the transition times should be identical or very close to it on seven yard targets with one yard apart, maintaining a high degree of accuracy within it. One common thing I see is a fast split (time between two shots on one target) and a slow transition. Work on having all three or four shots be the same speed, and then level that speed up with the metronome exercise listed later in this article.
Now that we’ve learned the components, let’s define what the path to mastery looks like when chasing transition perfection.
THE PATH TO MASTERY AND THE CAT AND MOUSE THEORY
As I started to chase perfection on transitions, I started to see a path to mastery that most shooters might take. In the beginning, most shooters don’t disconnect their head and eyes from the gun. This causes inaccuracy and slower transitions. The first part of this journey is learning to do that and then get the vision speed moving at maximum all the time. For me, that meant disconnecting my head entirely from the gun.
In the middle on the way to mastery, that disconnect of the head and eyes from the gun ends up becoming a time delay. Separating the head and eyes from the gun entirely means that the time taken to do these costs us time, which can also cause us to rush to the next target and have tension-related transitional errors. I spent a lot of time here personally, and it was only through trying to understand why my transitions didn’t look the same as some other high-level shooters that I figured out a great concept to mastery.
Tom and Jerry is an old cartoon about a cat and mouse that I remember from when I was a kid. It was a funny show where Tom (the cat) was always trying to catch Jerry (the mouse). The analogy I came up with to describe the end path to mastery in transitions was exactly this—cat and mouse. Once we’ve learned to separate the vision from the gun and always move the vision at maximum speed, we can start trying to catch the gun back up to the vision. The eyes are the mouse, and the gun is the cat. The eyes are always trying to escape while the gun is trying to catch it. This concept is a great analogy to what should be happening when it comes to a great target transition.
Now with that idea and the pursuit of it, you will also have to learn how to process and respond to information more quickly. Having less separation between the vision and the gun means if your processor (brain) is not up to the task of seeing that information, you will have a delay in your shooting. Some people mistakenly call this over-confirmation, but I believe it’s just that they can’t see the information quickly enough to make that decision to shoot.
Something that has helped me personally here was something a student showed me about two years ago called concentration grids. The idea behind this is that you have a grid of numbers, and your goal is to recognize and respond to those numbers with an action. For example, a five-by-five grid has numbers from one to 25. It is timed, randomized every time, and requires you to see and respond to information with an action (pressing the number with your hand). This was similar to what we might do in shooting, so I started working these a few minutes a day, and noticed in a few months that my shooting awareness had heightened as well. This is an excellent way to build additional “bandwidth” without the gun, which you can then use toward your shooting specific training with the gun. My personal best five-by-five score right now is 5.20 seconds, and I have the top score for the 6x6, 8x8 and 10x10 grids. (See if you can beat my scores here: tryconcentrationgrid.com.)
Now that we’ve gotten you all understanding the concepts and components of great target transitions, let’s give you a few exercises to work in training to get you there.
SOME DRILLS TO WORK ON AT HOME THAT GIVE MY STUDENTS (AND MYSELF) SUCCESS
Here are some of the most useful exercises I’ve found that helped develop my transition skill.
First off, we have the separation of the individual components I mentioned earlier. This is a four-part exercise and is a great warm-up.
Four-part transition micro-components—use a simple two-target setup for this:
EXIT: Start aimed on target. On the beep press trigger and yank gun off target as quickly as possible. Remember the bullet has left the barrel as your finger is starting to reset trigger and before recoil is felt.
ENTRY: Aim on target to left or right. On the beep, move gun precisely to where you’re looking and press trigger as soon as you see red on that spot (not a dot, but just the color red).
RETURN/RELEASE: Aim on one target. On the beep, press trigger twice. Return/hold still for the first shot, then release the gun off target as quickly as possible for the second.

Combine them together; aim on one target, on the beep, fire two shots on one target and then transition precisely onto next target (head/eyes first, then arms and gun follow). The goal is to exit immediately and enter precisely to fire immediately.
This next exercise gives us a great opportunity to learn to separate vision from physical movement and was developed by one of my mentors, Hwansik Kim.
HEAD/EYES/ARMS/GUN DRILL
Set up an array with like four or five targets of various types (use at least two or three open targets, though). Next, proceed through the drill like this, separating and adding in each component as the previous component is successful.
- Head and Eyes—maximum speed always. Shift your eyes and head from target to target as fast as you can, spotting that very small spot. Go left to right and right to left.
- Add Arms—add your arms only, without slowing down vision speed. Arms will lag behind—that’s okay and expected.
- Add Gun Without Trigger—draw the gun and cycle from target to target. Head and eyes will still be way ahead. Move to the next target when the gun meets your vision and is stable ever so slightly. Do not press the trigger. This allows you to see transitional issues more clearly.
- Gun With Trigger—now do the full thing with pressing the trigger. I like to go one way off the draw, reload and then go the opposite way. Then I switch. One rep, I’ll go left to right off draw and then right to left off reload. Next rep, I’ll go right to left off draw and left to right off reload. This way, I get both ways and a draw and reload into it.
The next exercise I saw the great Joey Sauerland performing, and I spent a few months using it and refining my take on it. It involves a metronome (a musical timing device), and it is excellent at learning how to figure out how to get quicker when the trigger speed is fixed. Here is the exercise.
METRONOME TRANSITIONS
The intention behind this exercise is to make the trigger speed fixed and force yourself to move the gun quicker from target to target in between. You’re not expecting perfect transitions all the time, but you are trying to achieve them and be aware of what’s going on and how to address it. The longer string of fire allows you to course correct as you’re going through it if you’re aware—and helps you dial in your skill faster.
A great starting standard to get to is 240 BPM (beats per minute), and the sky is the limit as far as how far you take it from there. The proper working limit is one where you’re stretching your ability, but still able to stay fully present and aware of what is going on. Here’s the procedure:
- Create a sequence you intend to follow for the time and rounds allotted.
- Set a par time anywhere between six and 10 seconds for dry fire, go through a magazine in live fire.
- On the beep, perform the sequence to the best of your ability to keep up with the timing. Be aware and see how you can get the gun precisely from spot to spot between trigger presses.
- You know you’re ready to move onto a more challenging speed or sequence when you’re easily moving target to target with a high level of accuracy and keeping the timing of the trigger press.
- To up the difficulty, feel free to add movement and shooting on the move into it.
This exercise is a game changer for transitions when done correctly. Five to 10 minutes a day will work wonders over a sustained period.
Another exercise that pairs really well with this is the “10 in four” exercise. This was another one I saw Joey Sauerland doing and spent a lot of time dialing it in with great results. Here it is:
10 IN FOUR OR LESS EXERCISE
The idea is that you have a target array sequence, and you will do 10 single shot target transitions from the draw in four seconds or less.
Just like metronome transitions, the difficulty scales with target width, distance and difficulty. You can do two targets back and forth, or 10 different targets. You’ll know you’re in the right place, difficulty-wise, when you can just barely make the time and get the required accuracy with intentional focus on it.
The intention here is that you are not allowed to change sequences until you’ve done two-in-a-row under the par time with acceptable hits (As and Cs).
You can adjust par times as needed up, but try making the sequence easier first before raising the par time if possible. For instance, you can have two targets relatively close together and go back and forth between them 10 times. It can be as complex or simple as you need to achieve a challenge and success.
You can also do two or three runs in a match mode style of shooting, then push to get the times under the time without regard to actual hits (define success differently). Then when you do that, you can solve to get the hits you want at the same time. This works well to gain skill and awareness in this exercise.
What I like about pairing this with the metronome transitions exercise is the shift of focus. Metronome transitions for me are about raising awareness and solving issues at speeds that are uncomfortable for me. I’m not expecting perfection, but I am looking to find what breaks and make it stronger. As for “10 in four,” it is about learning to process information and call acceptable hits at higher speeds. The idea is to guarantee 100% acceptable hits before moving on, at a high rate of speed.
By removing the second trigger press on a target, we are also forcing our information processing ability to grow. The second shot adds time on target, which allows our brain to “catch up” to what is going on. By removing that, our brain and visual system must be operating at their peak levels with challenging drills like this.
All of these should get you into a place to really start mastering transitions, and can create an excellently structured dry-fire/live-fire session. Now get to work saving that time.
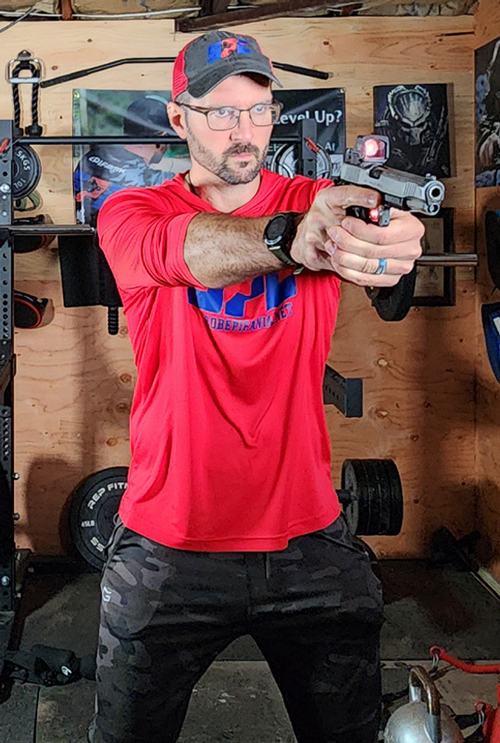
Reach out to Rob Epifania if you have any questions: [email protected]. Visit his website at robepifania.net.
Article from the January/February 2025 issue of USPSA’s magazine.