Ten-time NRA National High Power Rifle Champion Carl Bernosky shares his experiences during a do-it-yourself installation of a Geissele trigger.
Why use a two-stage trigger?
Carl Bernosky: For competitive shooting, the rules dictate a relatively heavy trigger weight—4.5 pounds for service rifle, so it’s nice to split that up using a two stage trigger. Once it’s prepped with the first stage, you’ll have less trigger pull for the shot. I take the first stage up before I ever start my hold. When I’m relaxed and ready to go, as my head goes down to the sights, the first stage comes off. Then the first thing I see that looks good, it’s gone. Hopefully [laughs]!

Is it a distinct separation between the two stages?
CB: Yes it’s a crisp trigger. That’s the nice thing about a Geissele trigger. There’s a very nice, positive stop and the let-off on the second stage is very crisp. That’s more important than weight.
Any advice for the first time installation?
CB: Geissele has very good instructions for installing their trigger. He goes into very good detail and doesn’t leave anything out. He gives you the correct pin-alignment punch and he has the springs pre-set, so you ought to be able to just go out and run it. I’ve never filed on one. The ones that he’s put in—I’ve never taken out, and the same goes for the ones that I’ve installed. Several years ago at Camp Perr, I stopped in at the Geissele table, thinking I better have him take a look at these things because I never did anything to them other than clean them and lube them. He blew them out, re-lubed them and they were ready to go.
What about lubrication?
CB: The thing with lubrication is that you don’t want to put it anywhere where it’s just going to collect dust. Be conservative. I don’t put it anywhere that doesn’t need it. Geissele provides some grease that I always use on his seer. Other than that, it’s best to not have a lot on there.
Installation
The only tools needed for installation were a 3/16 Allen wrench (to remove the pistol grip for access to the safety) and a 9/32 punch. I spent 10 weeks off-and-on, reading and studying the directions, and only 10 minutes installing the Geissele Match Service Rifle (nominal 4.5 lb.) trigger (MSRP-$279). The instructions are among the best I’ve seen. My AR15 required that I widen the safety notch slightly to accommodate the additional adjustments, which widens the trigger slightly. This is very clearly explained in the instructions. True to form, however, Geissele offers a widened safety as a separate purchase option to help simplify installation.

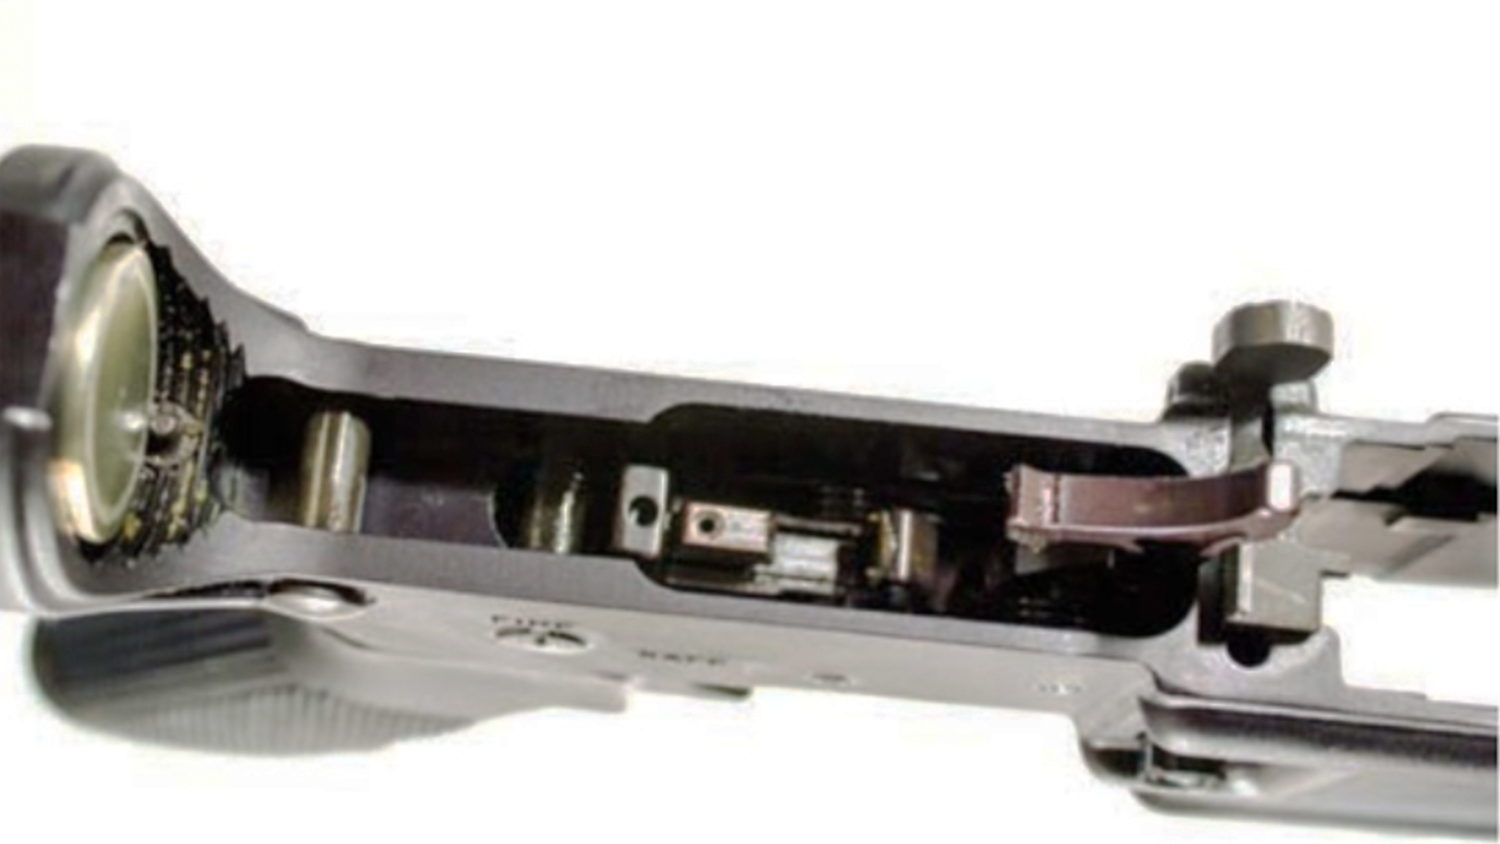
With the new Geissele trigger installed, you can see the two adjustment screws for sear engagement and second stage weight, as well as the skeletonized, smaller hammer that reduces lock time by half and focuses more energy onto the center of the firing pin. (These adjustments are the reason for widening some safety notches.)
Shooting Impressions
Like any other equipment change, you’ll need some practice time, even if it’s an improvement over what you’re replacing. In this case, I replaced my rough, “crushed glass” 6.5 lb. trigger with the Geissele and was impressed at how crisp and predictable it was.
However, in 2012 one of my scorers at Camp Perry observed that I had a heavy trigger pull, likely a holdover from my previous trigger experience. Nevertheless, my confidence with the Geissele was high and my scores improved by 90 points from the previous year. Other changes included a Microsight rear hood insert from Stalling’s Machine and some basement practice with the Crosman MAR117 air gun conversion kit.


