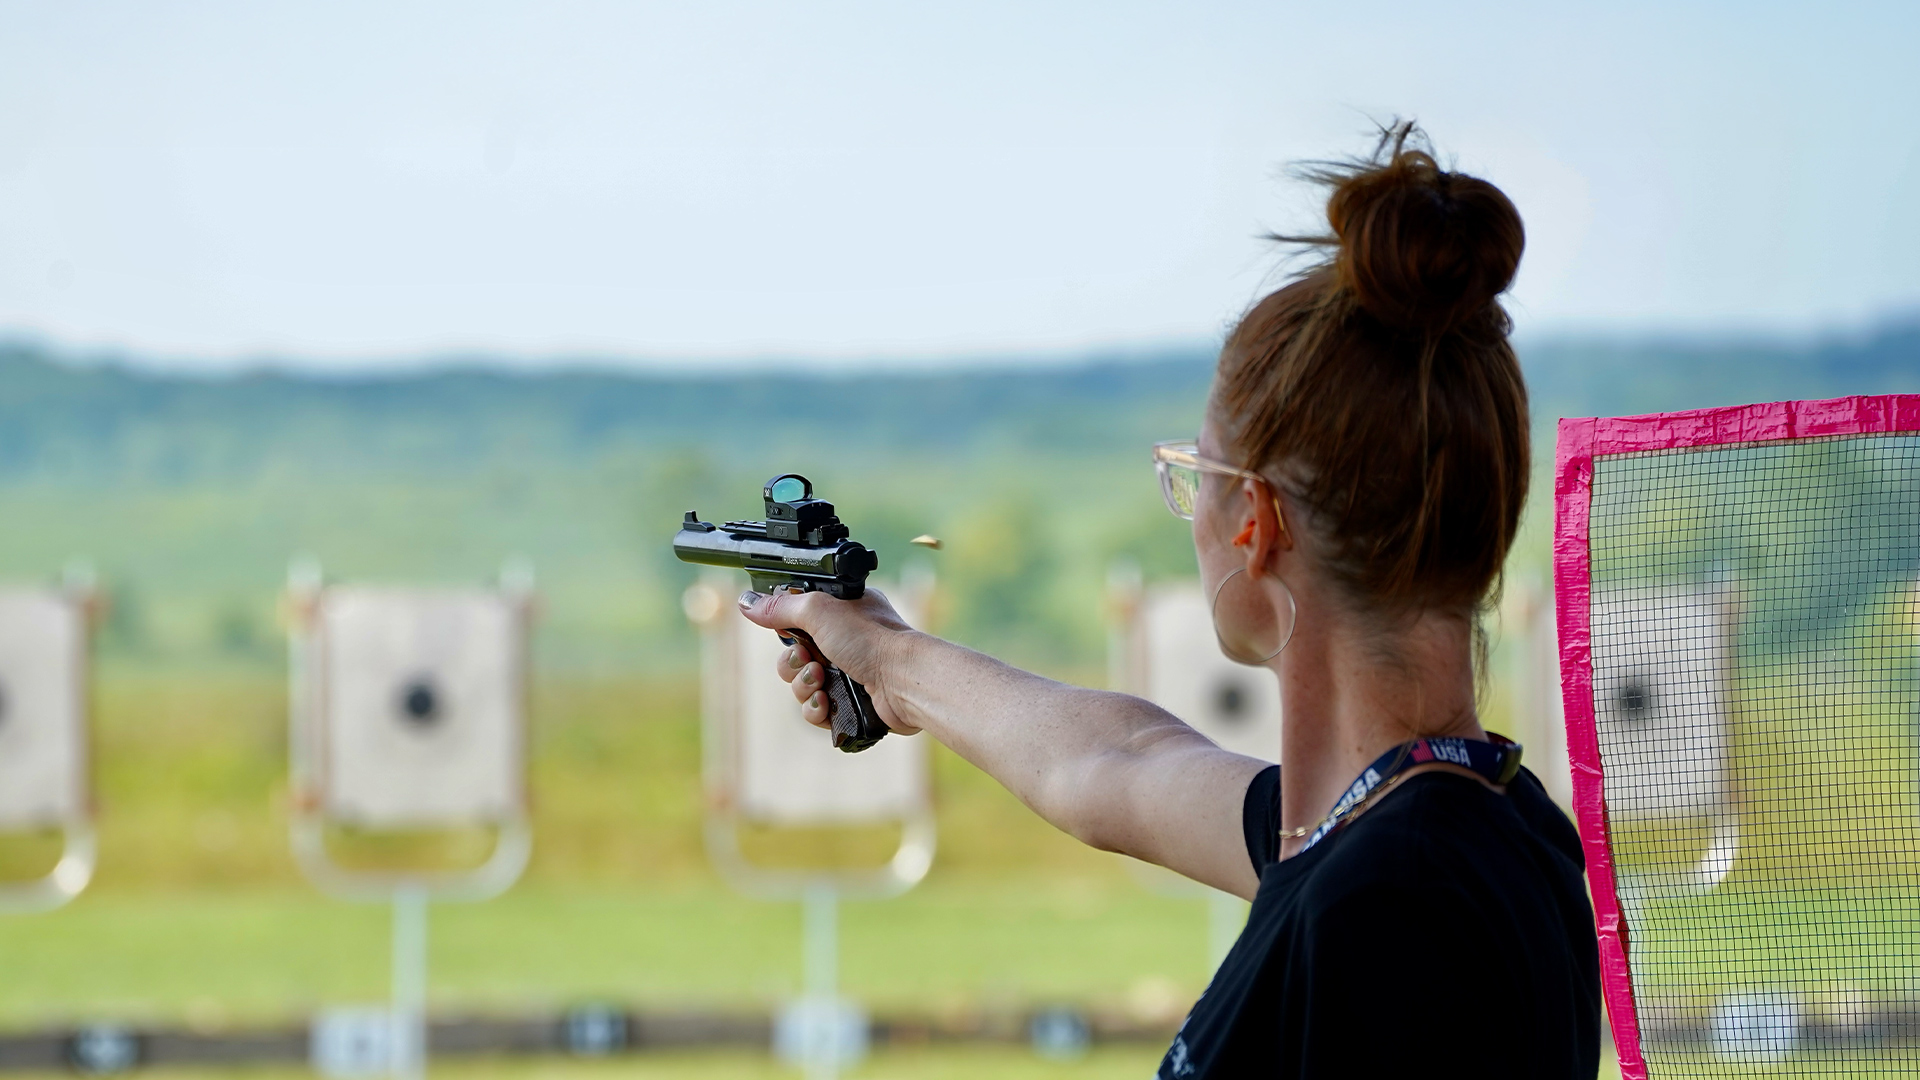
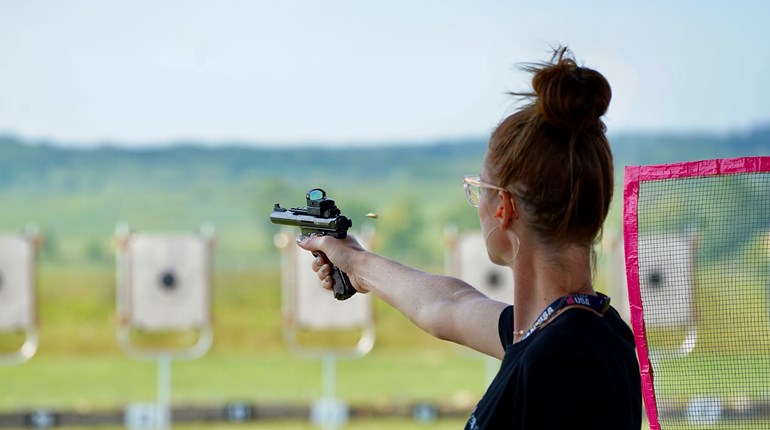
We have now arrived at the final stage in this series covering the strategies for all eight of the sanctioned Steel Challenge stages in a match. This of course is Outer Limits.
I’ve saved this stage for last for several reasons, including the fact that it is easily the most difficult to learn to shoot well. There are many reasons for this, but the most obvious is that this is the only stage where there is movement—and if you don’t have any background with the other action-shooting sports like USPSA or IDPA, movement while shooting during a stage can be quite intimidating.
Therefore, one of the things I hope to do with this two-part article about how to shoot Outer Limits is to show you how to make this stage much less difficult to learn to shoot. The key to shooting this stage well is all in your footwork versus your shooting mechanics. Now don’t get me wrong, gun mechanics are important, but without the proper footwork, you’ll always struggle on this stage no matter how “fast” you can shoot.
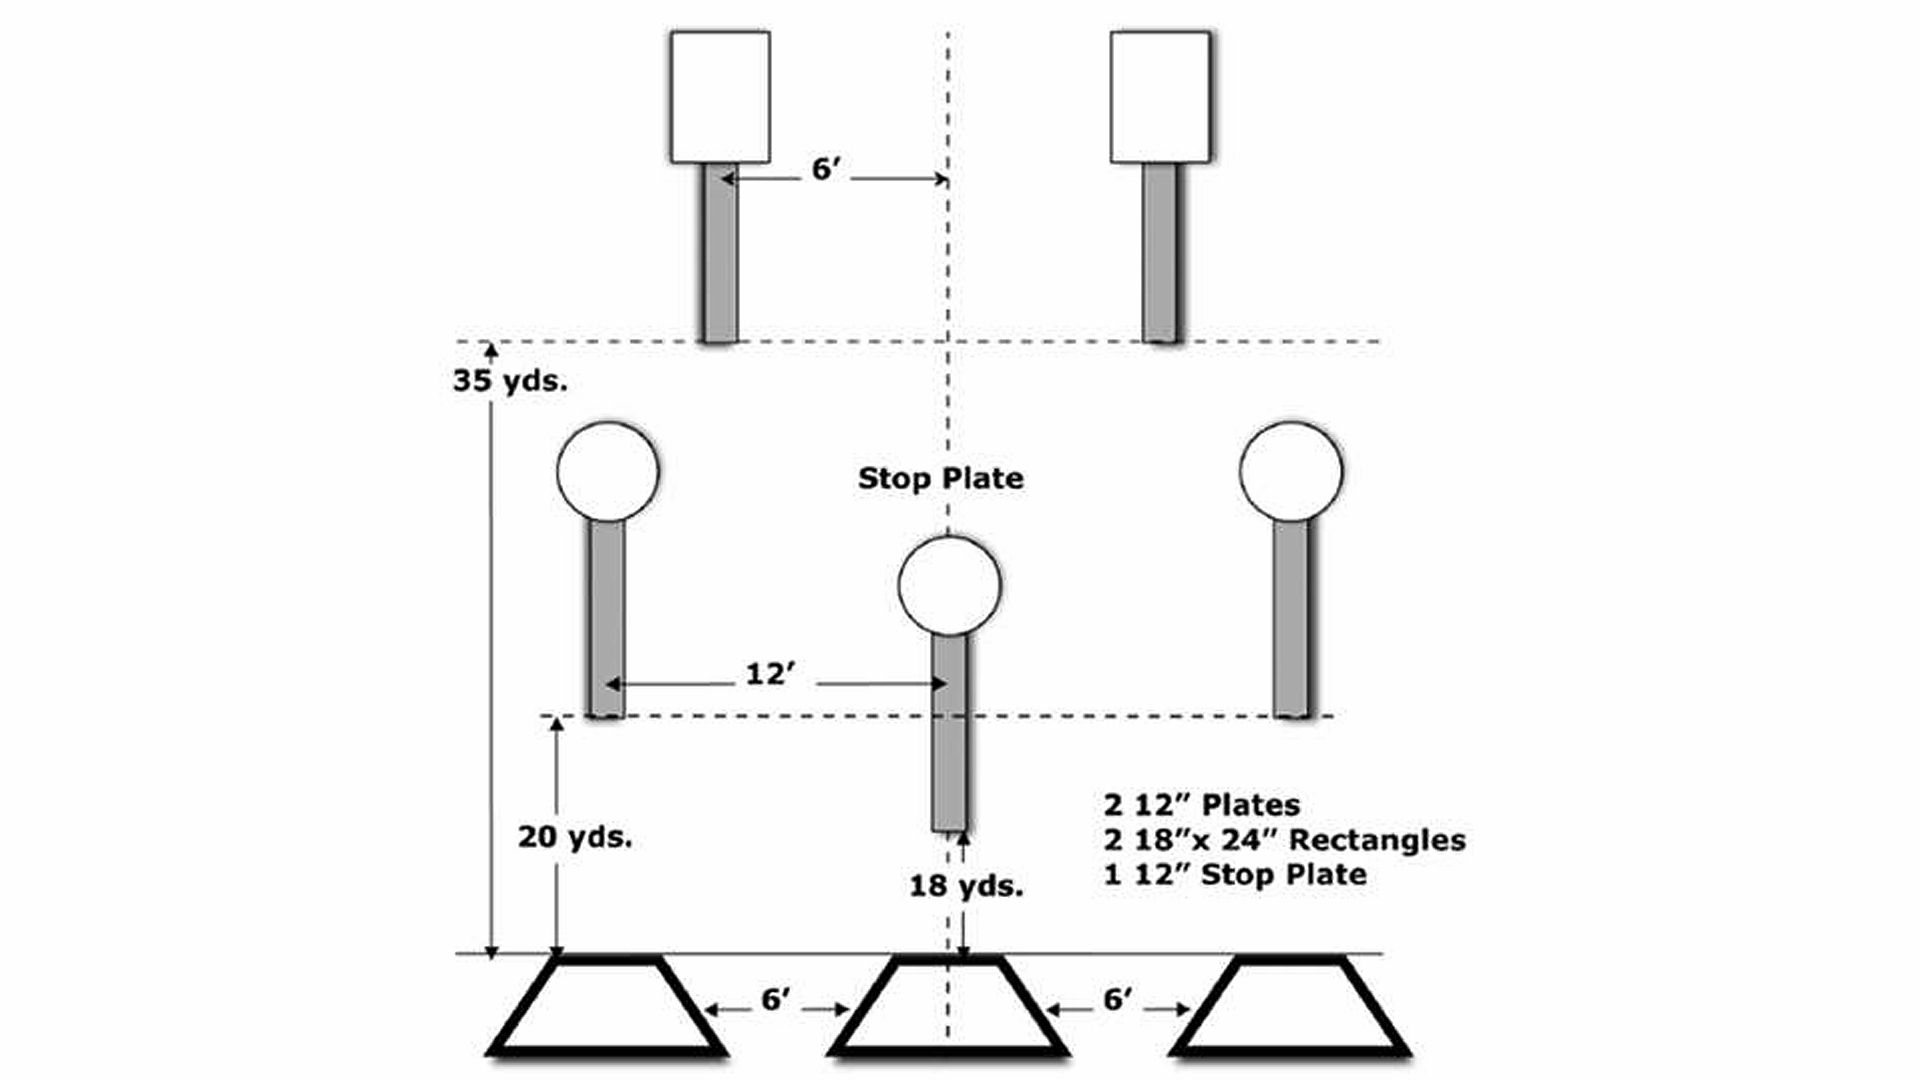
Without a doubt, this is the quintessential stage in a Steel Challenge match. If your usual Level 1 match does not include this stage on a regular basis, I highly encourage you to do whatever it takes to get exposed to shooting this under match conditions. If you are looking to excel at this sport, it is mandatory that you shoot Outer Limits (and train on it) regularly. Steel Challenge’s most demanding skills can be found here, with 12-inch plates at 20 yards, 18x24-inch rectangles at 35 yards, transitioning between them and, of course, movement.
Let’s start the discussion by talking about what options you have for selecting a shooting order, given the restrictions the rules place on you.
For starting position, you must begin in the box that corresponds to your weak-hand side (left box for right-handers and the right box for left-handers). After the start signal, you are only allowed to engage the two targets which appear on this same side of the stop plate; these are plates #1 and #2 for right-handers and plates #5 and #4 for left-handers. After hitting these two targets, you can only engage the remaining three plates from the center box. Looking at your options as a right-handed shooter, you only have two from the right box—either draw to #1 (12 inches at 20 yards) or #2 (18x24-inch rectangle at 35 yards).
This is the only stage where I break my rule of only doing one reversal transition. My first shot is always to the 18x24-inch rectangle. I do this because it’s a bigger target (easier to hit), which means I can be more aggressive on the first shot/draw. Many people like to draw to plate #1, since you then transition left to right to shoot #2, which is the same direction you need to move to get to the center box.
While I don’t disagree that this is true, because of the distances involved and the lateral separation between #1 and #2, this is not a very wide transition and I don’t feel I give up much, if anything, in comparison to what I gain by being able to be very aggressive on the first shot. The ultimate decision-maker for this should be your timer. When I put myself on the timer, I was always faster shooting #2, #1 than the other way. It is also less risky, which is a major consideration on this stage, because if you miss the second plate and have already started your movement, you’ve destroyed any chance of having a good run.
While I believe there is room for reasonable debate on the best shooting order for your starting box, there is no debate as to the best order for the center box. Oddly enough, I see a large percentage of shooters who don’t get this right. For right-handed shooters, the only order that makes sense is #4, #5 and stop plate—yet, I see countless shooters who shoot #5 first for some reason. When I ask them why they do this, the answer is almost always the same: “I see that plate first as I enter the box.”
My response is also always the same as well: “Then you’re doing it wrong.” If you are executing your entry into the center box correctly, you must see plate #4 first. It cannot be any other way, and here’s why—you are moving from left to right and plate #4 is left of plate #5, so you have to see it first as you move sideways.
Think about Pendulum for a moment. It is basically set up the same way as Outer Limits, with two plates at an equal distance side by side on either side of the stop plate (ignore distances for the purpose of this discussion). While standing in the shooting box, point your gun at plate #1 and then move your gun left to right and transition to #2, #4 and finally #5. You always see #4 before you see #5, right? Well, Outer Limits is exactly the same, except that you have to physically move in between transitioning between plates #1 and #2 and #4 and #5.
So why do shooters mess up this shooting order on Outer Limits? The answer lies in their movement techniques. Watch any right-handed shooter whose shooting order in the center box is #5, #4 and the stop plate, and what you’ll see 99% of the time is that they lower their gun and point it at the ground as they move. By the time they get their gun back into shooting position, since they are also moving laterally at the same time, they have already passed #4, so that the first target they see is #5. This is not the same as the first target they could see if they had better movement skills.
If they were to keep their gun up while they were moving, the first target they would see before even entering the center box would be the stop plate followed by #4 and then #5 last. Obviously, you don’t want to be shooting the stop plate, so you shoot the first target you see as you enter the box, which is #4. This also happens to be the easier of the two targets, which allows you to be more aggressive and shoot it at the earliest possible moment upon box entry.
Now that we’ve got the shooting order figured out, we need to turn our attention to the physical act of moving between the two boxes. We want to do this not just as quickly as possible, but also in such a manner as to allow us to begin our movement out of the first box at the earliest moment possible after shooting the last plate and then begin shooting again at the earliest possible moment as we enter the center box.
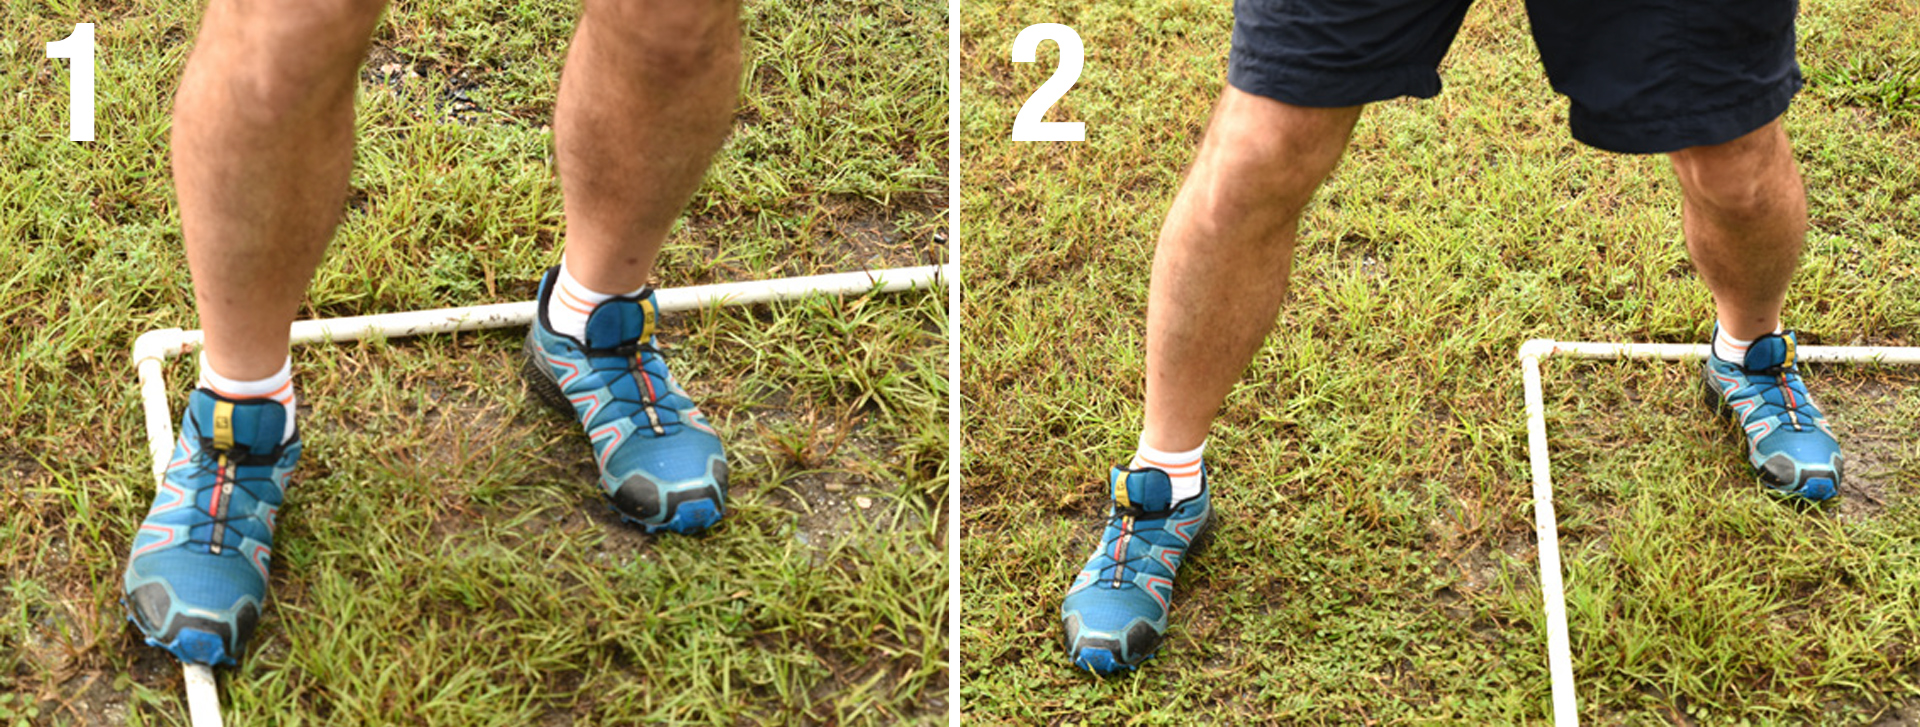
Step one is to locate yourself within the left-hand box in the most optimal position (see figure 1). I set up in the back right-hand corner with my right foot on top of the shooting box and my weight slightly favoring my left foot. This position allows me to do a couple of things. First, with my weight centered on my left foot, it enables me to execute an explosive push-off with the left foot as I step out and forward with my right.
By starting in the back of the box, my first (and subsequent) steps all have a forward component to them versus purely lateral movement, which means I can move much more aggressively. Never use a cross-over step to exit the shooting box. This is clumsy, awkward and slow when compared to a side step. You also minimize the total distance you need to go by setting up in the right side of the box.
Next you need to determine exactly how many and how big the steps need to be to get you into the center box. Get yourself some PVC tubing and make two regulation 48x48-inch boxes, or just mark out two boxes with tape on the ground the appropriate distance apart. Once you do this, you’ll see that there is a total of six feet between the two boxes, with another two feet added to get into the center of the center box.
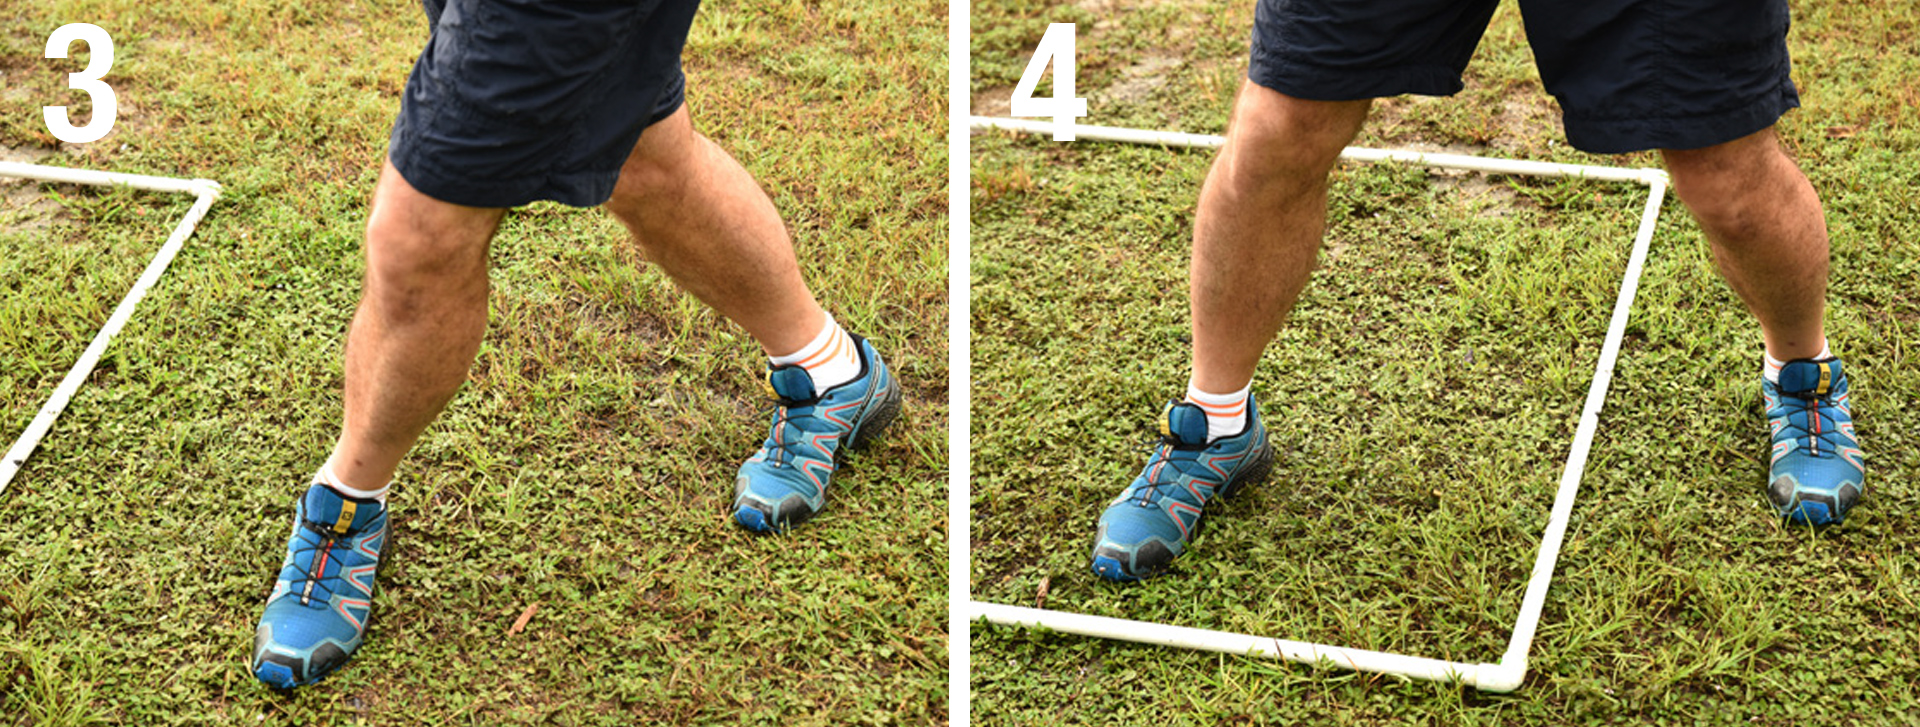
Assuming you start in the right-hand corner of the left box, this means you have to transition approximately eight feet to be able to begin shooting. Take some time here and walk through several iterations to figure out how many and how big each step needs to be to execute the transition smoothly. For me, my first step with my right foot (figure 2) lands about half way between the two boxes (I’m six feet tall), which allows my second step with my left foot (figure 3) to land just outside the center box. By the way, no matter how many steps you need to execute the transition, your left foot should land just outside of the center box as your right foot enters the box.
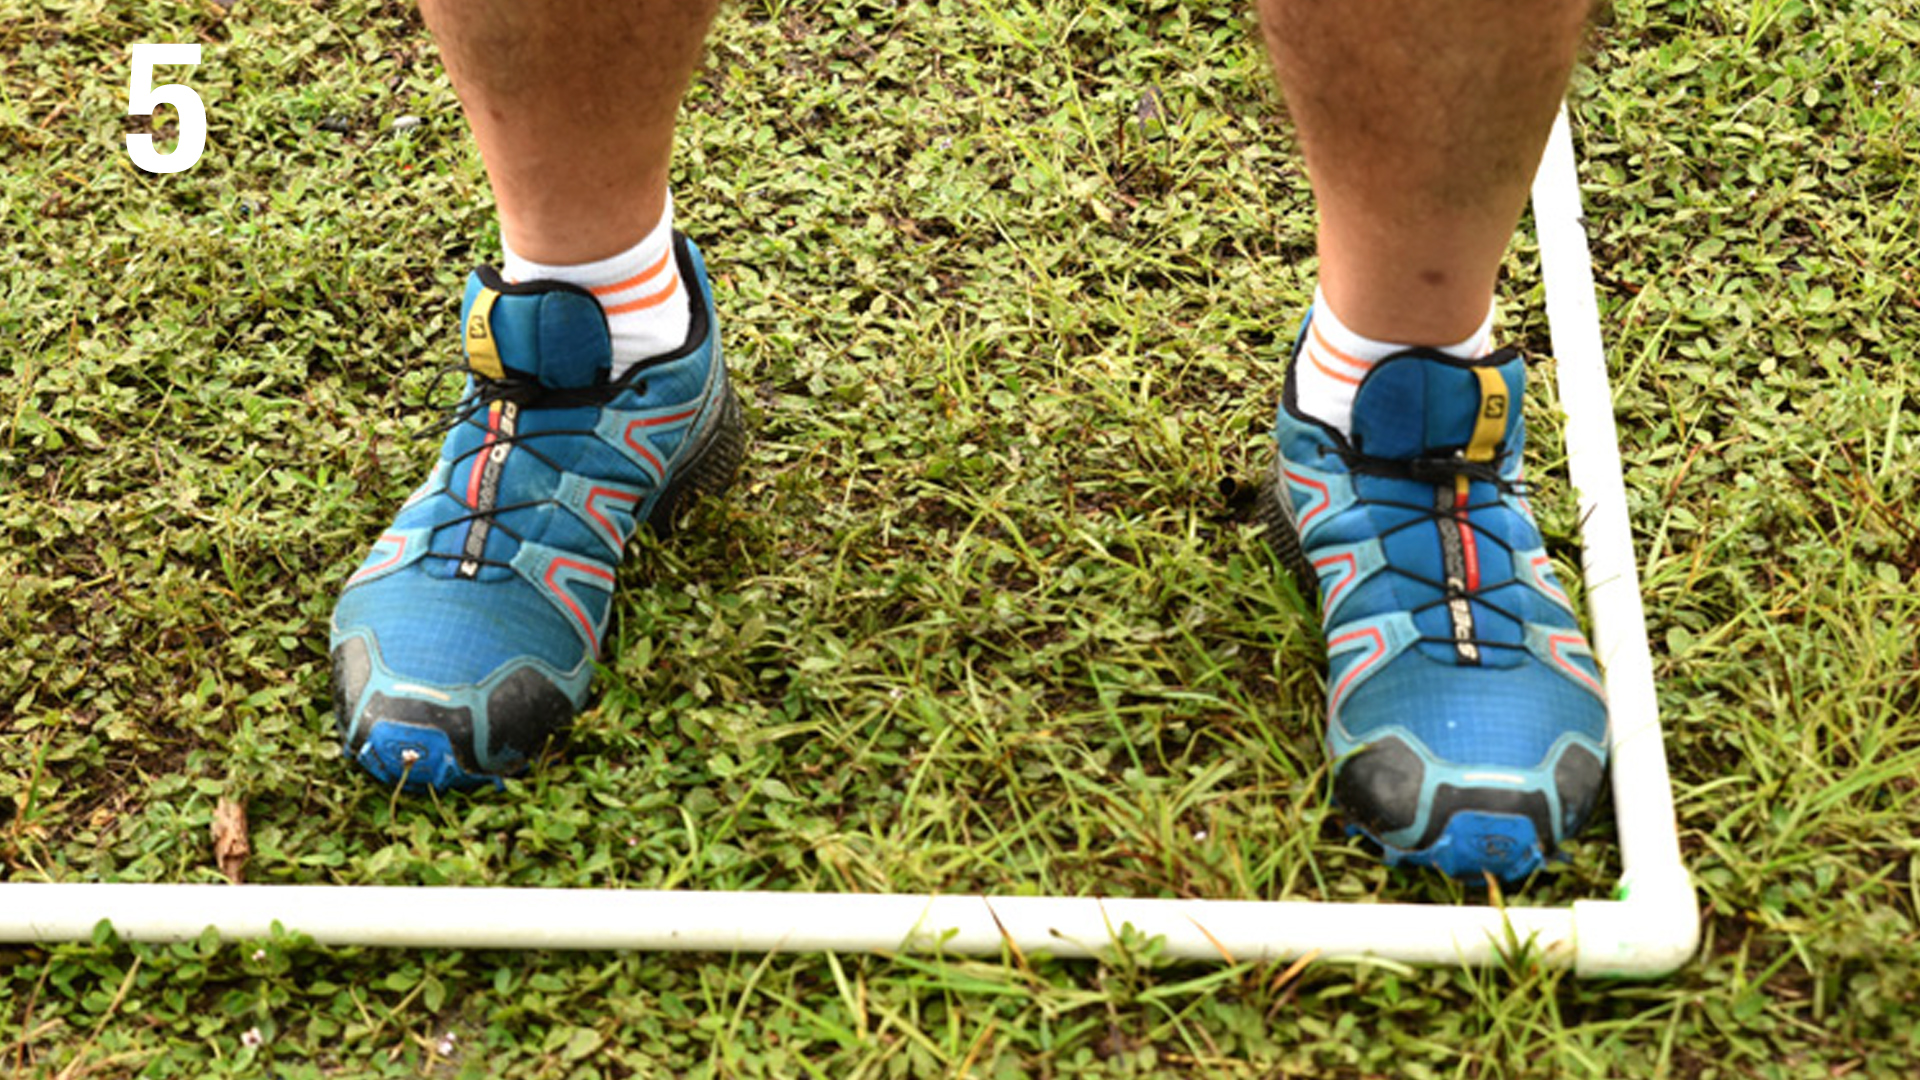
By setting up in this way, your first step into the box is with your right foot (figure 4), which helps you decelerate and stop your motion, also contributing to settling the gun. Your left foot then smoothly and softly glides into the box (figure 5), allowing you to instantly break the shot if your sights are lined up. If you get this reversed and enter the box with your left foot first, then as you plant your right foot, you will almost always disturb your sight picture as your foot hits the ground, since it is on the same side of your body as your strong hand. You now have to wait additional time for the sights to settle—or worse, take the shot too early and have to take one or more make-up shots. (Refer to the above photos to see what your footwork should look like.)
This completes the basic discussion of proper footwork, and I encourage you to spend as much time as required to commit this to your subconscious memory before moving on to including your gun and actually firing any rounds downrange. Once your footwork is subconscious, you’ll be amazed at how straightforward shooting this stage can actually be.
Always remember that slowing down is never the right answer—you need to learn to shoot faster.
Article from the January/February 2025 issue of USPSA’s magazine.