** When you buy products through the links on our site, we may earn a commission that supports NRA's mission to protect, preserve and defend the Second Amendment. **

My son likes to watch “unboxing” videos. These are pervasive and some sort of outgrowth of the empowered-consumerism movement that started a few decades ago. But that’s just my optimistic thinking.

The idea is that the package comes in, the camera starts rolling and the box is opened. Its contents are unwrapped and exposed, then assembled and made ready for use. The next step is to reveal the suitability, serviceability and value of the product by putting it to use right away, straight out of the box. Call them out if it’s no dang good.
Good idea, right?
Now, I’ve seen these done for firearms and there’s one very important thing to disregard. That’s the literal “out-of-the-box” test. The idea is to take a new gun out of its box, often right at the range, load it up and commence to firing. We’ve seen them with 100-round “torture-tests” to prove or disprove worthiness—claiming that’s a demonstration-evaluation of how well that firearm is made.
No, it’s really not. Don’t ever do that!
There’s at least a little “break-in” on any firearm—some more so than others.

My late, great Uncle Darrell was a genuine, card-carrying master vehicle mechanic. He worked mostly on immensely heavy equipment. Uncle Darrell used to say that the life of a new car depended a lot on its first 1,000 miles. He also used to say that some folks could tear up an anvil with a tack hammer.
I don’t know that it’s possible to tear up a pistol in its first 1,000 rounds, but it can be battered and needlessly worn if it’s not prepped and maintained before (and during) at least that many initial rounds.
Depending on the gun, the areas of metal-to-metal surface contact points and also depending on the nature (composition) of the materials riding against each other, there’s more or less damage potential. Harder wears softer. Greater surface areas effectively create and endure greater friction. “Galling” is when there’s enough friction and enough difference in hardness (also surface smoothness) of two parts that they stick instead of slip, abrading at least one surface.

Here’s my take on “break-in.” It’s a lapping process where small surface mismatches between moving parts have a chance to get better matched. Ever notice how a trigger often feels lighter and smoother after a new handgun has fired a couple boxes of ammo? Or how a safety switch gets easier to work? Or any number of other buttons, latches, and levers move easier and smoother? That’s break-in—the absence of notchiness and the presence of smoothness.
When a trigger pull improves with use, it is purely wear that’s improving it. The initial wear resulting from friction between uneven surfaces will not continue at that same pace once the parts are mated or melded better. And, unfortunately, if that trigger improves, shooting it more and more won’t eventually turn it into a hand-fitted, gold-medal-level trigger. Wish this was so, but better is better.

So, given that there is metal-to-metal wear, those points need lubrication to make the wear productive. Running a gun sans-lubricant with the thought that it will “break-in” faster is not only wrong—it’s wrong-headed.
Unboxing
So, you have your new gun in the box, all wrapped up. Got all those tags and bags and papers and what not. Now it is time to get that bad boy unwrapped.

First, locate the owner’s manual. I do not intend to judge or offend, but locate the owner’s manual and read it. You might be familiar with firearms with enormous experience, but you might not know this one.
Folks at the range get somewhat nervous if they see someone with one hand on their gun and the other holding the owners manual. Get it figured out, and do it all “dry,” (no ammo in sight) before heading to the range. Learn how to operate the gun: load, unload, latch and unlatch.

Most importantly, learn how to take the gun apart. Then, take it apart. We’re going to slick it up and put it back together.
Different makers take different approaches to prepping a gun prior to shipment. Some guns ship with lubrication already in place. This is another great reason to read the manual. There are also differences in different firearms designs with respect to lube points and lube types (grease or oil).

The new gun doesn’t really need to be cleaned, not following the common routine of “cleaning a gun”—solvents and brushes and all. I recommend running a patch through the barrel bore. There might be some manner of chemical treatment there to guard against corrosion, and there also might be just plain old previously-airborne particle-pieces (some call it “grit”), and maybe residue from test-firing. Any and all need to disappear. Add some oil to points of contact (again, be sure to check the recommendations in the manual)—most notably the slide rails, barrel lug, trigger mechanism contact points and slide stop engagement. Now, remember that one drop of good oil is plenty. Don’t douse it down, because the lube only needs to be exactly at the contact points to be perfectly effective for our shooting needs.

Now put it back together and then work it several times. Just rack the slide, dry-fire or double-action stroke a revolver. Do this until you get tired of it, but at least a few dozen times. You’re getting that break-in started, and you’re getting used to the trigger.
More On Break-In
Ever sharpened a knife on a whetstone? If you use some oil on the stone as you should you’ll see the black metal fines floating in the oil after a few honing strokes. Hint: If you don’t use oil you’ll see them embedded in the stone surface.
Another hint is that taking a knife from sharp to really sharp removes hardly any metal in any measurable amount, but, again, there it is. That’s why lube is important. If it wasn’t suspended and surrounded by the oil, it would attempt to become embedded in the surface just like on the stone. That’s a source of undue abrasion.

Once you’re home from the range with a big smile on your face and a well-tested gun in your range bag, you’ll want to get that gorp gone. The same gorp on the whetstone, along with firing residue, is all up in your gun.
One very important point that there just wasn’t enough room to get started on (let alone finish) is that there are some firearms designs that take on way more than what I described here to be range-ready for a first outing. An AR-15 is the first that comes to mind. Do not take one of those out of the box and just start shooting the fool out of it. This is a big-time mistake. I’ll be doing an article shortly devoted to that popular gun, which also covers other similar ones.

And another important point: Learning to lube guns isn’t exactly rocket science. Pay attention to what you see when you break it down for a cleaning. And, be sure to put some lube between those really shiny spots!
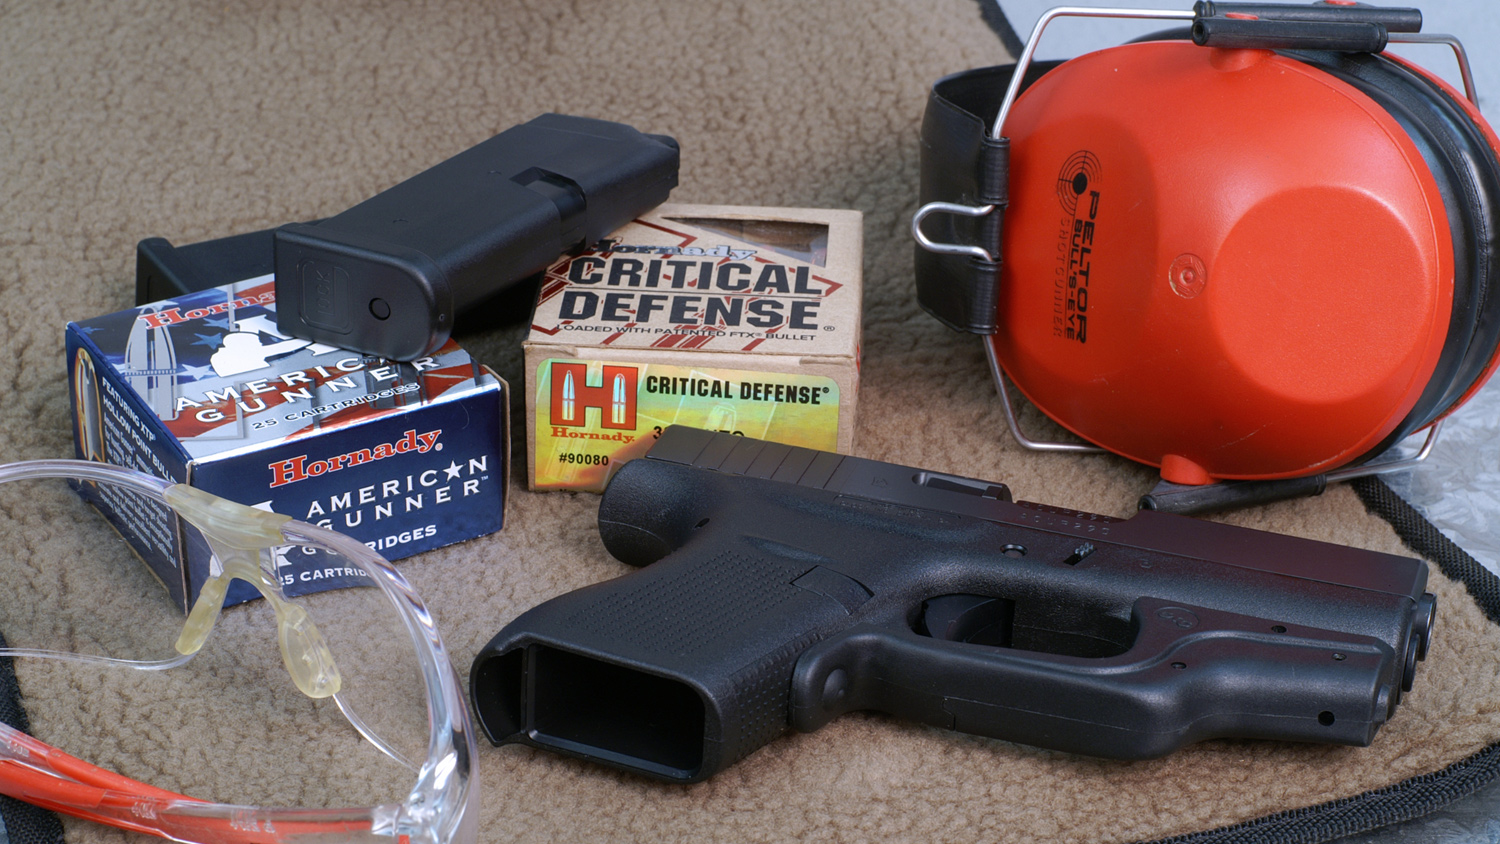
Lead photo by Peter Fountain, art by Karen Haefs
More articles by Glen Zediker:

Before you take your brand new gun to a match, or even just to the range, you are going to want to perform the steps outlined in this article to ensure peak performance. Also, be sure to examine the contents of the packaging, because every company is different regarding what they include in the box.
The idea is that the package comes in, the camera starts rolling and the box is opened. Its contents are unwrapped and exposed, then assembled and made ready for use. The next step is to reveal the suitability, serviceability and value of the product by putting it to use right away, straight out of the box. Call them out if it’s no dang good.
Good idea, right?
Now, I’ve seen these done for firearms and there’s one very important thing to disregard. That’s the literal “out-of-the-box” test. The idea is to take a new gun out of its box, often right at the range, load it up and commence to firing. We’ve seen them with 100-round “torture-tests” to prove or disprove worthiness—claiming that’s a demonstration-evaluation of how well that firearm is made.
No, it’s really not. Don’t ever do that!
There’s at least a little “break-in” on any firearm—some more so than others.

This gun shipped with a copper-based paste lube already in place. Glock was wise to pre-lube the gun, just in case one of those ninja unboxers gets a hold of it.
My late, great Uncle Darrell was a genuine, card-carrying master vehicle mechanic. He worked mostly on immensely heavy equipment. Uncle Darrell used to say that the life of a new car depended a lot on its first 1,000 miles. He also used to say that some folks could tear up an anvil with a tack hammer.
I don’t know that it’s possible to tear up a pistol in its first 1,000 rounds, but it can be battered and needlessly worn if it’s not prepped and maintained before (and during) at least that many initial rounds.
Depending on the gun, the areas of metal-to-metal surface contact points and also depending on the nature (composition) of the materials riding against each other, there’s more or less damage potential. Harder wears softer. Greater surface areas effectively create and endure greater friction. “Galling” is when there’s enough friction and enough difference in hardness (also surface smoothness) of two parts that they stick instead of slip, abrading at least one surface.

For handguns, I use a patch wrapped around a nylon bristle brush to clean up, not a patch and jag (a jag is a specialty rod attachment that holds a patch). The patch reveals what was left in the barrel of this little unboxed Glock (test-fire residue).
Here’s my take on “break-in.” It’s a lapping process where small surface mismatches between moving parts have a chance to get better matched. Ever notice how a trigger often feels lighter and smoother after a new handgun has fired a couple boxes of ammo? Or how a safety switch gets easier to work? Or any number of other buttons, latches, and levers move easier and smoother? That’s break-in—the absence of notchiness and the presence of smoothness.
When a trigger pull improves with use, it is purely wear that’s improving it. The initial wear resulting from friction between uneven surfaces will not continue at that same pace once the parts are mated or melded better. And, unfortunately, if that trigger improves, shooting it more and more won’t eventually turn it into a hand-fitted, gold-medal-level trigger. Wish this was so, but better is better.

The Glock G42 is a typical striker-fired, semi-automatic pistol. At this quality level, expect it to be reliable and pretty simple.
So, given that there is metal-to-metal wear, those points need lubrication to make the wear productive. Running a gun sans-lubricant with the thought that it will “break-in” faster is not only wrong—it’s wrong-headed.
Unboxing
So, you have your new gun in the box, all wrapped up. Got all those tags and bags and papers and what not. Now it is time to get that bad boy unwrapped.

First, locate the owner’s manual. I do not intend to judge or offend, but locate the owner’s manual and read it. You might be familiar with firearms with enormous experience, but you might not know this one.
Folks at the range get somewhat nervous if they see someone with one hand on their gun and the other holding the owners manual. Get it figured out, and do it all “dry,” (no ammo in sight) before heading to the range. Learn how to operate the gun: load, unload, latch and unlatch.

Why you need to read the manual: This model came with a key. I unboxed this to replace my S&W Model 29 outdoors-backpack gun. My Model 29 had no key.
Most importantly, learn how to take the gun apart. Then, take it apart. We’re going to slick it up and put it back together.
Different makers take different approaches to prepping a gun prior to shipment. Some guns ship with lubrication already in place. This is another great reason to read the manual. There are also differences in different firearms designs with respect to lube points and lube types (grease or oil).

A good cleaning kit includes the following: one-piece rod, patches (square is my preference), bristle brush (stiff nylon bristles are my preference for handguns, the one pictured here is from J. Dewey, as is the rod) and good oil. You need all this, so get it when you get your gun. Go ahead and get bore cleaner. You’ll need some soon enough. Hoppe’s #9 is effective and benign, meaning it won’t hurt anything, unlike the damage-potential from stouter specific-use solvents.
The new gun doesn’t really need to be cleaned, not following the common routine of “cleaning a gun”—solvents and brushes and all. I recommend running a patch through the barrel bore. There might be some manner of chemical treatment there to guard against corrosion, and there also might be just plain old previously-airborne particle-pieces (some call it “grit”), and maybe residue from test-firing. Any and all need to disappear. Add some oil to points of contact (again, be sure to check the recommendations in the manual)—most notably the slide rails, barrel lug, trigger mechanism contact points and slide stop engagement. Now, remember that one drop of good oil is plenty. Don’t douse it down, because the lube only needs to be exactly at the contact points to be perfectly effective for our shooting needs.

I still put a little oil over the top of the new gun’s slide, just to be safe.
Now put it back together and then work it several times. Just rack the slide, dry-fire or double-action stroke a revolver. Do this until you get tired of it, but at least a few dozen times. You’re getting that break-in started, and you’re getting used to the trigger.
More On Break-In
Ever sharpened a knife on a whetstone? If you use some oil on the stone as you should you’ll see the black metal fines floating in the oil after a few honing strokes. Hint: If you don’t use oil you’ll see them embedded in the stone surface.
Another hint is that taking a knife from sharp to really sharp removes hardly any metal in any measurable amount, but, again, there it is. That’s why lube is important. If it wasn’t suspended and surrounded by the oil, it would attempt to become embedded in the surface just like on the stone. That’s a source of undue abrasion.

After oiling, we dry-fired the gun several times between us, cycling it each time to set the trigger. I broke it down one more time and ran a patch around the slide rails and over and into a few recesses. The photo above shows what this amount of cycling produced. It’s that whole whetstone analogy personified. The black is metal. No firing yet.
Once you’re home from the range with a big smile on your face and a well-tested gun in your range bag, you’ll want to get that gorp gone. The same gorp on the whetstone, along with firing residue, is all up in your gun.
One very important point that there just wasn’t enough room to get started on (let alone finish) is that there are some firearms designs that take on way more than what I described here to be range-ready for a first outing. An AR-15 is the first that comes to mind. Do not take one of those out of the box and just start shooting the fool out of it. This is a big-time mistake. I’ll be doing an article shortly devoted to that popular gun, which also covers other similar ones.

Different moving parts, different parts movement. Patch the barrel bore and the cylinders. Put a drop of oil on points of clear contact: crane, ejector rod, cylinder latch and cylinder stop.
And another important point: Learning to lube guns isn’t exactly rocket science. Pay attention to what you see when you break it down for a cleaning. And, be sure to put some lube between those really shiny spots!

Now the gun is ready. If yours is anything like this little gun here, it’s been bought for a purpose beyond fun on targets. I got my box of “break-in” ammo and my box of “take-home” ammo. Shoot enough of each and then make sure you know where it’s going.
Lead photo by Peter Fountain, art by Karen Haefs
More articles by Glen Zediker:


