WARNING: All technical data in this publication, especially for handloading, reflect the limited experience of individuals using specific tools, products, equipment and components under specific conditions and circumstances not necessarily reported in the article and over which the National Rifle Association (NRA) has no control. The data has not otherwise been tested or verified by the NRA. The NRA, its agents, officers and employees accept no responsibility for the results obtained by persons using such data and disclaim all liability for any consequential injuries or damages.
This installment will further explore aspects of optimizing optics for accuracy testing. Our previous article addressed scope magnification, proper target size, crosshair focus and parallax. It may be useful to those who missed them to read Part 1, Part 2, and Part 3 of this series.
Optical Sight Accuracy Testing, continued:
Elevation and Windage Adjustment Verification
One basic rule to remember in shooting is, “I don’t *know* what I think, I only *know* what I measure.” That is, your scope literature may say it has 0.25 MOA clicks, but until you verify it, that’s an unknown.
This author has seen target scopes with >0.35 MOA clicks, that were advertised as having 0.25 MOA adjustments. Take nothing for granted! One older target scope that had been sent back to the factory for updated knobs returned with 0.43 MOA clicks. Needless to say, before it was discovered, getting a 1000-yard zero was a nightmare.
Obviously, as ranges increase, the number of clicks needed to zero by trajectory data does also. This disparity (0.25 vs 0.37 MOA) accumulates, and point of impact increasingly wanders away from the desired area. This has been known to lead to frustration, confusion, and in severe cases, perhaps even vile language (but, never here at the AMU, of course!).
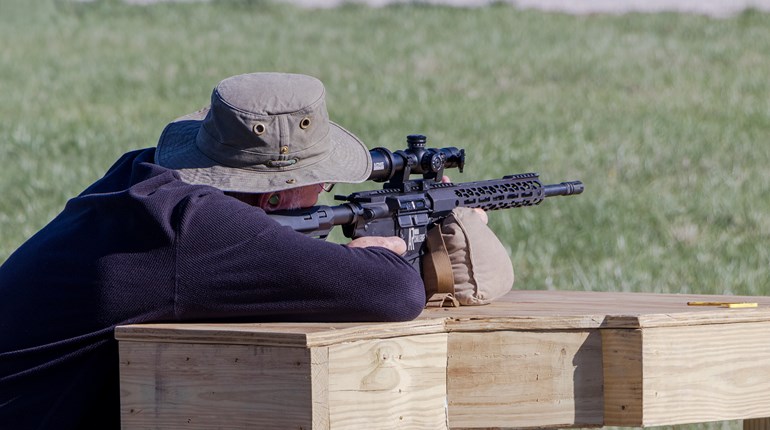
To quickly check one’s scope, fire a group from the bench at 100 yards, and then adjust the scope “up” 20 MOA. Fire another group at the same aiming point as before, and then measure the distance between groups. It should be close to 20.0” with most MOA scopes.
One beginning 1000-yard shooter’s personal target scope only moved the second group 17 inches. A new click-value was calculated for his scope, and he then calculated correct elevation adjustments for 600 and 1000 yards. Once zeroed at 600 yards, he adjusted for 1000 yards. He used his calculated click-value with data from his bullet maker’s ballistic tables, at his chronographed velocity. His first shot ever at 1000 yards hit the 10-ring!
Nuances of Scope Magnification
Eventually, the question arises: “What power scope should I use?” With excellent technique and some practice, shooters can group very well at 100, 200 yards and beyond with a 9-10X scope, always adjusting the aiming mark to suit their magnification and crosshairs at each distance. Greater power means greater resolution, or the ability to aim at a smaller part of the target.

Moreover, it helps one see any movement of the rifle on the bags easier, and thus fine-tune one’s technique to better remove the inconsistency. For general testing, approximately 20-24X can serve quite well. However, when bumping up to, say, 36X, one sees every little tremor—much more dramatically than at 24X. One’s heartbeat may become very evident through the scope.
What can be seen, can be adjusted for—one modifies the bench technique to reduce movement, resulting in maximum accuracy. This is an illustration of the oft-quoted popular movie line, “Aim small, miss small.”
Shooters who are already accustomed to high power optics usually find a significant increase to be a boon. Those coming from, say, 4X–10X straight to 36X may find that this slows their shooting significantly until they learn to fully stabilize their rifles on the rest.
Mirage
Finally, there is mirage. This may be mirage out on the range itself, which can be helpful in wind reading, or mirage seen in one’s scope due to barrel heat.
Mirage can cause problems of an indistinct aiming point, or shifting of the apparent aiming point away from the actual location on target. This grows worse (i.e., more visible) as magnification increases. Range mirage occurs when heat rises from the ground, and it can be especially difficult in hot, humid conditions and when firing prone.
Getting out of prone and onto a bench can help reduce the effects of ground mirage. Lowering the magnification on a variable-power scope can also sometimes improve one’s ability to cope.
A “mirage band” is often used by Match Rifle shooters. This is a cloth or elastic strip about 2” wide that runs from the receiver, under the objective lens, and out to the muzzle.
Its purpose is to divert barrel mirage out to the sides of the band and away from the scopes’ optical path. In severe cases, mirage may rise from the muzzle, even when using a band, and thus distort the target image. Even a little wind is excellent for dispersing mirage due to barrel heat.
This concludes Part 4 of our series on accuracy testing and chronographing. In the next article of this series, we’ll explore the use of iron sights during accuracy testing.
SSUSA thanks the U.S. Army Marksmanship Unit for allowing the reprint of this article.


