WARNING: All technical data in this publication, especially for handloading, reflect the limited experience of individuals using specific tools, products, equipment and components under specific conditions and circumstances not necessarily reported in the article and over which the National Rifle Association (NRA) has no control. The data has not otherwise been tested or verified by the NRA. The NRA, its agents, officers and employees accept no responsibility for the results obtained by persons using such data and disclaim all liability for any consequential injuries or damages.
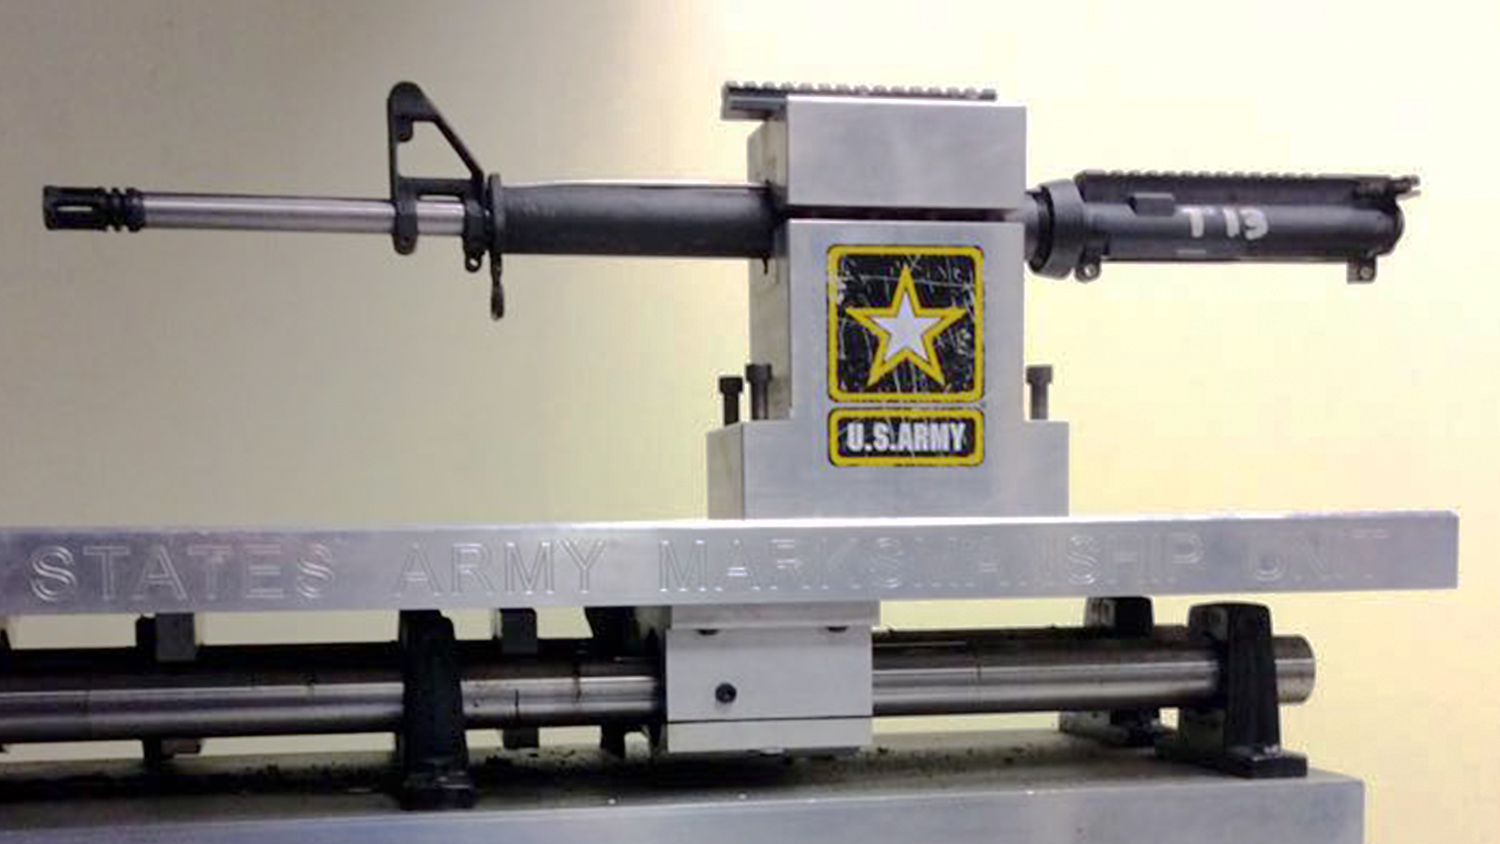
Above: In Photo 1, this machine rest illustrates ideal straight-line, consistent tracking under recoil.
In this article the U.S. Army Marksmanship Unit (AMU) departs from handloading technique and theory to address the final results of our work. How does our ammunition perform? How well does it meet our specific needs? And finally, how do we capture valid data for decision-making in our testing?
Bench Testing Technique
Testing one’s rifle from a rest for accuracy can be fairly simple once the basic tenets are understood. However, it does require consistent, focused attention to detail. Knowing those principles and the essential details will help shooters to obtain their rifle’s best accuracy and to properly assess their ammunition.
Part 1—Begin with the obvious—check tightness of all screws and fasteners such as action screws, scope base and ring screws, etc. This can also include parts of one’s rest equipment -- e.g., the main post of the typical benchrest pedestal.
The author got “bitten” many years ago when accuracy testing his personal NM Beretta 92 with a series of carefully and laboriously constructed match loads, using his personal Ransom Rest. The pistol did not perform well with any ammunition tried and, in fact, shot much worse than expected. Several load combinations were tried, all with similar results.
Belatedly, he checked the rest and found that a screw securing the rest to its’ base had come loose! All that tedious time spent at the loading bench was wasted! From that day on, the author began each pistol testing session with a group from his known-to-be-good “control” match handload, to verify that the system was working correctly.
Part 2—Keep good records! Mark and label your test ammunition so that cartridges can be identified should a box get mixed up. This can prevent much needless confusion and suffering. Keep both ammo and test results well organized. Scrawled abbreviations on disorganized targets with incomplete data can be very hard to interpret, months after the fact.
Instead, immediately measure groups and record them in a well-organized notebook or record system. This will ensure your components, loading and testing time will not be for naught.
Several target measuring computer programs/apps are available. These record not only the load/firearm data, but retain photos of the targets with precision measurements illustrated. They are a great way to quickly and compactly organize and track your work.
Part 3—Bench testing technique: Firing a rifle to obtain its’ maximum accuracy from a sandbag rest uses much the same theory as a quality machine rest. The key mantra here is *the rest does all the work*—i.e., the rifle should be fully supported by whatever rest/bag method you choose, and as little muscular effort as possible should be used to “steer” it or keep it on target.
Obviously, the tensions of one’s cheek on the stock, butt against the shoulder, firing hand on the grip, etc. will differ when testing a .22 rimfire vs., say, a .300 WSM. Rifles generating more recoil require greater control for consistent performance.
However, the key here is *consistency*. Learn and strive to always use highly consistent pressure on the grip, cheekpiece and buttstock for every shot to ensure accurate results.
Set up the rifle so that the crosshairs are exactly on the aiming point when supported by the rest, without the shooter’s touching the rifle at all. That is the ideal. The shooter should exert as little muscular control over the rifle as possible to keep it on target during firing.
Sub-optimal benches, rests or positions may require very slight adjustments to perfect the aim while testing. However, as much as possible, those adjustments should be made via the rest/bags.
Upon firing, the rifle should slide straight to the rear in recoil. After firing, the rifle should be returned to its’ original position, crosshair alignment and bag stability checked, and the next shot is carefully taken. Early on, this may seem almost an excruciatingly slow process. However, with practice it becomes natural and one can do it quickly and efficiently, so don’t be discouraged.
Note the details of the machine rest in Photo 1 at the top of this article. This rest, designed and built by the AMU’s Custom Firearms Shop (CFS), allows the rifle to track straight to the rear very precisely.
Great care was taken to ensure that it had optimum, smooth and consistent resistance on the rails (below the bed) to dampen recoil uniformly. After firing, the rifle is carefully returned to the original firing position without handling it roughly or bumping it to induce vibration.
This rest gives excellent results with a wide variety of rifles ranging from 5.56mm to large magnums. The straight-line tracking of this type rest is the goal for one to emulate when shooting from a bench.
AMU CFS Test and Handloading personnel also test rifles from various benchrest, bag and bipod setups at distances to 1000 yards and beyond. This is an important skill, which is perishable if not practiced periodically once it’s been finely developed.

Part 4—What type of rest is needed? Many shooters use well-built, adjustable “benchrest” style pedestals (See Photo 2 above). These feature integral sandbags to support the fore-end, along with fine, lockable elevation adjustments. In addition, various “eared” type leather/cordura sandbags are used to support the buttstock.
Having a precision rest, especially with an adjustable top that allows fitting the sides to each rifle’s fore-end, can greatly simplify testing. Moreover, a rear sandbag that matches the stock’s bottom contour well also helps streamline testing.
Expensive equipment, however, is not a requirement. Excellent shooting can be done with simple canvas bags filled with sand, stacked and arranged to give stable, consistent support to the rifle.
For decades, the ubiquitous homemade sandbags have employed empty 25-lb. birdshot bags, lined with plastic and held closed with a simple twist of wire. In this case, use a number of bags to build a sturdy, stable platform for the fore-end, rather than just a couple of bags stacked on top of each other.
In the end, having a good understanding of the fundamentals, plus good technique helps far more than having expensive equipment without the skill to exploit it!
Read Accuracy and Chronograph Testing, Part 2.
SSUSA thanks the U.S. Army Marksmanship Unit for allowing the reprint of this article.


