When I commenced with the AR15 as a competition rifle, I did a whopping lot of load development. At the time, “we” were all sorting through options attempting to get the most from a .223. I had just slunk away from a long relationship with an M14 and hadn’t changed my load (ever) for that rifle.
Given routinely insufficient information attached to reloading data (again, much was new and most figures were coming from someone’s tailgate), a lot of “sure-fire” combinations I’d had hot tips on, just didn’t. I got tired of bringing home half-empty boxes of loser loads and otherwise worthless cartons of poor-performing ammunition. What to do with cartridges that either won’t shoot well or may possibly come apart in the rifle. Pulling bullets and reusing components was out of the question for me since I’m lazy. To compound and consternate matters, this was taking way too much time. I had a good two-hour round trip to take day-to-day to get the next batch on target, not to mention the loading work at the home bench between trips.

The solution came from benchrest shooters. These folks load their ammunition right at the range, and frequently right on the bench they’re shooting from. They do this by reason of tuning loads for the needs of the day, and are able to complete the entire reloading process out in the open, largely because of the (pristine) condition of their spent brass. for example, they might use and reuse the same handful of cases for an entire tournament, without even resizing the case necks.
When I go to the range now for load testing, I take boxes full of sized and primed brass, propellants, a powder meter, a chronograph, bullets and a means for seating bullets. That’s it. Oh, and a notebook (no kidding) and some targets. Testing at the range provides the opportunity to be thorough and flexible. you also have the opportunity to do more testing under more similar conditions and, therefore, get results that are more telling. Once you are there, you can stay there until you get the results you want. No more waiting until next time.
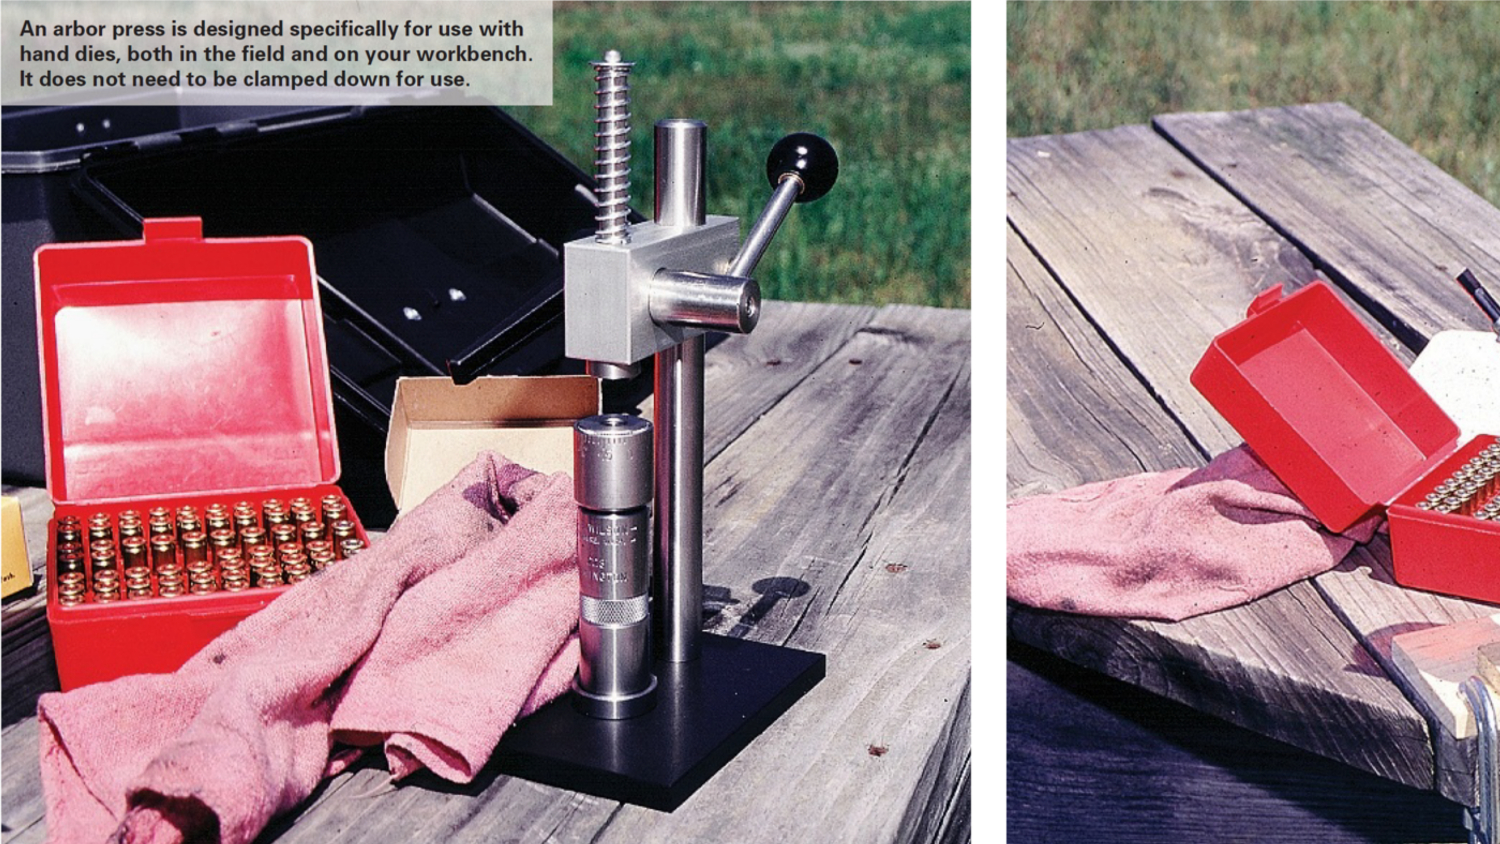
There are Benchrest-world handloading tools available—those engineered to be used at the range. Since there is little to no need for sizing, their specialty “hand dies” can operate without a conventional press. However, it’s plenty easy to replicate the utility of a hand-style seating die without nearly as much investment. All you need is one of the tiny Lee-brand 7/8-14 threaded presses, with your seating die threaded into it (adjusted to the press) and a couple of C-clamps to secure the press to a work surface. Even though it’s inexpensive, for myself at least, I determined that the difference between loaded round quality is measurably non-existent, comparing it to my press that’s bolted to my home bench.
If you are doing bullet seating depth experiments or otherwise need to change bullet seating depths, the better a seating die can be indexed to a setting, the more useful it is at the range. Redding, Hornady and Forster all make excellent and reliable seaters with micrometer-style tops. A good seating die can replicate a previous setting just by dialing to it, so take time to know the true value of a click through testing at home. If you’ll have the same seating depth no matter what (such as for magazine-length rounds) and be using the same bullet for your tests, then it probably doesn’t matter if the seating stem is easily and accurately adjustable.
Powder Meter
The meter provides a means for incremental propellant workups and powder transport and is, in my estimation, the portable tool that needs the most attention. I use a Harrell’s Deluxe, but no one honestly needs that “much” meter for development. There are less expensive alternatives (some also provided by Harrell’s) that no one won’t like. All Harrell’s models use a precision “Culver” dispensing drum that clicks to denote each increment, have thread-on powder bottles and a built-in bench clamp. Those attributes each contribute to determine how well you’ll get along with your meter at the range. Metering precision is likewise outstanding and that, of course, is the primary function of a propellant dispensing device. You have to be able to count on it, and also count back on it.
The reason a Culver device is superior is because it’s repeatable. To clarify, a Culver (named for Homer Culver) is a design or style of metering device. Its adjustment knob clicks just like a match rifle’s rear sight. Click to a setting, then click it elsewhere, and then click it back, and you will have the same setting you started with. If you know your meter throws another tenth and a half grains of VARGET per click, for instance, then you have a good idea how many clicks to adjust after the fi rst run of rounds downrange. You can come home and duplicate any charge tried at the range, click to it, throw a charge, check and record the weight.
If you don’t want to invest in a meter with a Culver apparatus, take the time at home to check the values of each index mark on the meter you have. And without some means to adjust via an indexing apparatus, the whole process of range testing comes to a virtual standstill. A Redding or Forster meter, for instance, has a micrometer-style arm that provides reliable indexing with accurate returns, moving up or down. Once you use a Culver, though, you’ll be sold.
I transport my propellants for the day’s testing in meter bottles. These bottles have a threaded cap (the same as on a one-pound Hodgdon powder bottle). Remove the bottle cap, invert the powder measure, and thread on the bottle. When you want to switch propellants, invert the meter, unscrew the bottle and replace it with another one. Simple and fast. Otherwise you’ll have to pour propellants back and forth. Not a big issue, but better is better.
I mentioned the tenth-and-a-half increment in VARGET, and that sort of thing is crucial to know. Preparation is the key. The way I confirm a meter setting and then determine its increments is by weighing 10-throw pans on my scale (scale set to indicate 10 times the throw weight). There’s no question in my mind that you’ll get a more accurate meter setting by consolidating 10 throws into one pan rather than by weighing 10 separate throws. Done enough times using enough different setting changes, and you’ll get an accurate assessment of the weight value of a single click. Since different propellants have different granule confi gurations, one click of a 4895 may not equal the same increment as would one click of a 4350. Take the time to sort your meter and you’ll save that time back in spades when you take your show on the road.
Why not weigh charges and be exact? Well, outdoors is not a good environment for a scale—digital or beam-style. It’s easy enough to set the scale into a box to somewhat protect it from environmental influences, but it’s tedious in use and, in my opinion, of little significance to the outcome of a test decision. One reason is that we’re not (or sure shouldn’t be) pushing the absolute limit on propellant charge.
Another is that propellants showing undue sensitivity should be avoided altogether. Considering the accuracy of a truly good meter, working up loads using a meter index is a safe and sane practice, even if those loads will all eventually be weighed-in when the resultant match ammo is loaded at home.
Transport and Setup
There are a few benchrest benches where I shoot, so I can clamp my press and my meter to one. Otherwise, it doesn’t take a lot of effort to construct a handy “table top” to position atop a tailgate, or tote along a portable workbench. The small press will fit into a toolbox, along with the meter and some kit items. I carry my propellants in a soft-sided insulated cooler. I also take along cleaning and maintenance equipment for the rifle. My chronograph is positioned where it needs to be, atop a discount-store camera tripod. All of this comes along with me in one trip from the Jeep. Probably the most important piece of equipment is your notebook! No kidding. I don’t trust my memory for seconds at a time! Write it down, write it all down. Masking tape or labels come in handy too.
The last consideration then is what to test, now that you have access to immediate gratification! Whatever it is, keep it simple, and that means one thing at a time. The fewer variables—the more revealing the test results and, ultimately, the more time you’ll save (less time you’ll waste). Usually, the test is a new bullet or a new propellant.

Process
The process I follow varies with the goal, but if it’s a fresh development (say a new bullet tried atop different propellants) I usually load and fire three samples when I’m at a brand new combination, just to get an idea of tangibles like bullet velocity. I’ll then increase propellant charge by whatever I deem reasonable based on the results of those three rounds, and try three more. I know that three rounds is hardly a test, but if it looks bad on that few, it’s not going
to get any better. When velocity is in the ballpark of what I anticipate attaining (say, within 100 feet per second), I’ll then start shooting five rounds per trial. As things begin to get all happy looking, round count increases. All rounds go into a target and the sight setting never changes. I’m even putting the low-end loads on the same target because I’m hoping I’ll see that “sweet spot” propellant that doesn’t shift elevation on small increases or decreases in powder charge. Group size is always leading me toward or away from more experimentation with a particular propellant. Eventually, it gets to 10-15 round comparisons of the better two or three loads and, ultimately, any decisions are confirmed on another day using ammo I assembled in a larger quantity at home. I always clean the barrel when I switch bullet brands or propellants.
After arriving at a few conclusions, and hopefully finding a load you’re ready to get to work on in volume once back home, load a couple more of those to take back with you. It’s also wise to carry back any loads that defined the “ceiling.” I usually just throw the charges into a case and then seal over the mouth with masking tape. The reason is that I want to weigh the charges and make sure I ended up with what I thought I did. Do this for bullet seating experiments too. Just cap a couple of empty cases with the setting you found shot best.
Read Part 2 of Glen Zediker's two-part series.


